Your GitHub account is a great showcase for your skills and experience as a developer. It can include personal projects, projects you’ve contributed to, open-source projects you are part of, or any other kind of project you’ve worked on over the years.
With time, you’ll find that certain repositories no longer belong in your GitHub portfolio. You might have used older techniques and made coding mistakes that you wouldn’t make now. Some repositories might be outdated to the point that they shouldn’t be used by anyone. Not only are such repositories unhelpful, but they could make you look less professional.
This article will explain how to delete a GitHub repository using the UI, how to archive a GitHub repository, and then how to achieve those same results by using Rewind, formerly known as BackHub, instead.
The Basics of Closing a Repository
There are two basic ways to close a GitHub repository and end its lifecycle. You can delete it permanently using GitHub’s UI, or you can archive it, which makes it read-only.
Below are instructions for performing both tasks. The key is knowing which option to choose, and what factors you need to consider when making your choice.
Deleting a Repository
When you delete a GitHub repository, you delete it permanently with all its data, including the codebase, issues, pull requests, and everything else related to it. Proceed with caution when using this method, as you will not be able to restore the data.
Open the repository you want to delete. At the top bar, click Settings.

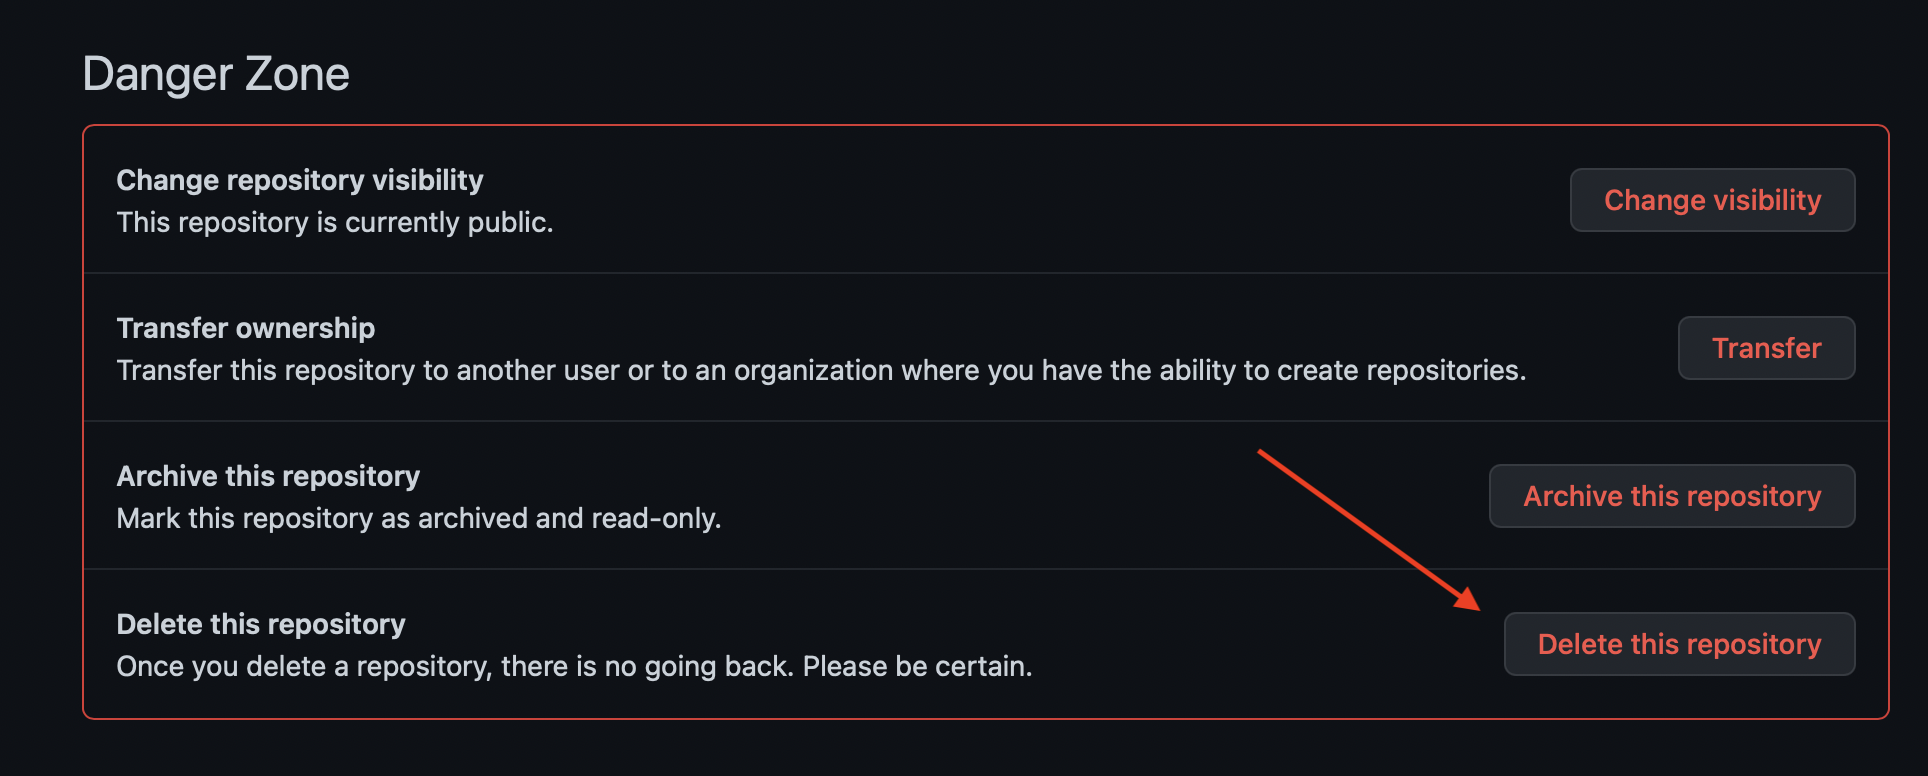
Scroll down until you get to the Danger Zone. There, click Delete this repository.
A window will pop up asking you to confirm by entering the repository’s name.
Once you confirm, the GitHub repository will be deleted, but you’ll be able to recover it from your settings within ninety days. After ninety days, the repository will be completely gone.
Archiving a Repository
When you archive a GitHub repository, it will still be viewable to everyone, but a notice at the top of the repository will show that it’s read-only.
Before you archive a repository, make sure that you close or resolve any open issues and pull requests, as you won’t be able to do that afterward.
To archive a repository, open it and click the Settings tab.

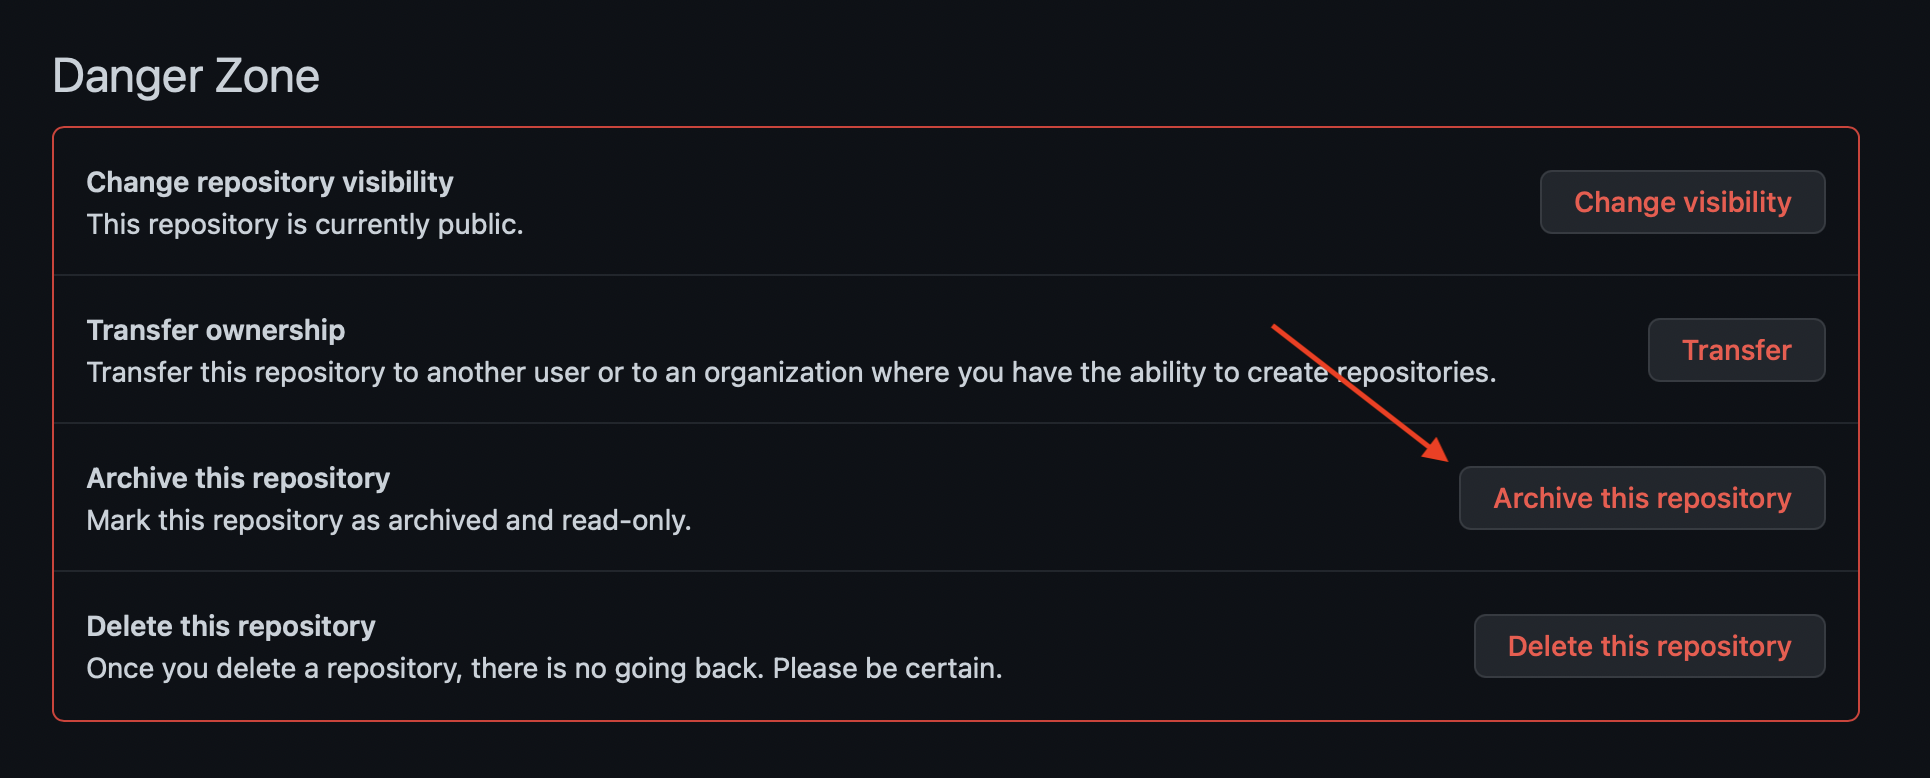
Then, scroll down to the Danger Zone section and click Archive this repository.
When you click on the button, a window will ask you to enter the repository’s name to confirm.
Once you confirm, the repository will be archived and a notice will be added to the repository’s page.

You can always reverse this action by going to the Settings tab, scrolling down to Danger Zone, and clicking Unarchive this repository.
How to Choose
If you’re absolutely sure that you won’t need the repository or any of its data anymore, then go ahead and delete it. This is also the better choice if you’re concerned about people being able to access the repository.
However, if you just want anyone who views your profile to know that they shouldn’t use this repository, or if you think you might need it in the future, then it’s best to archive the repository instead.
Downsides of Both
Each of these options has a problem that you should be aware of when choosing between these approaches.
Local Copies Remain
When you delete a repository, any local copy of the code—on your machine or other machines—will not be removed. The code will still be available, just without the remote repository.
If you’re removing a repository to ensure that it’s deleted from other people’s devices, be aware that this approach will not do that. This will just remove the repository from GitHub.
Forked Repositories Are Usable
Although archived repositories are read-only and changes cannot be made on them, they can still be forked, or copied. This means that someone can fork your archived repository and keep using it normally.
Therefore, you shouldn’t archive a repository on the assumption that no one will be able to use it or do rework on it.
Using Rewind Instead
Rewind provides you with a better approach to archiving or deleting repositories. It connects to your GitHub account and backs up your repositories daily. The backup includes not only the codebase but also issues, pull requests, and other metadata.
Benefits of Backups
Rewind allows you to restore a repository to any given point in time after you start backing it up. This includes open repositories as well as repositories that you’d deleted but had already backed up.
When you delete a repository in GitHub, it becomes archived in Rewind. That means it won’t need further backups, but you can restore it and its associated data at any point in the future. You can also delete the archived repository completely if you’re sure you won’t need it anymore.
Restoring a Deleted Repository with Rewind
After you create an account on Rewind, it will automatically back up all your repositories or the repositories you choose to give access to.
Once all your repositories are backed up, you can safely go ahead and delete a repository on GitHub by using the same steps listed earlier.
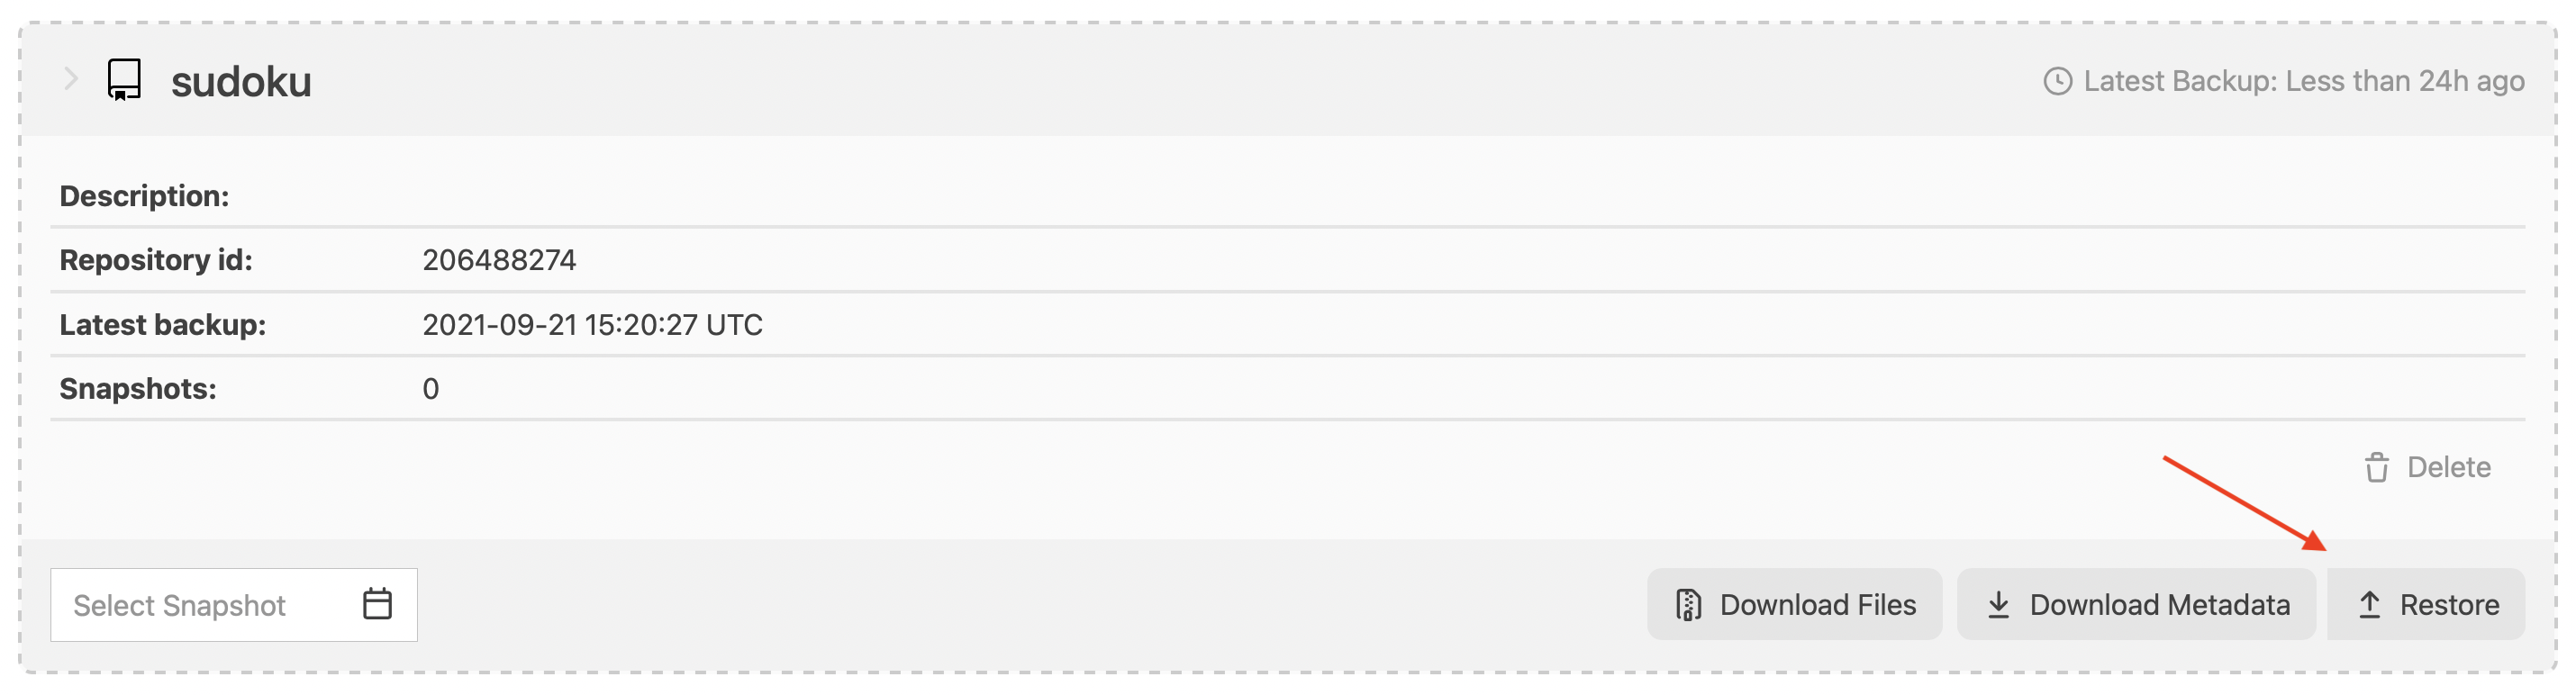
After the GitHub repository is deleted, you will find it grayed out in your Rewind account. This means the repository is now archived in Rewind.

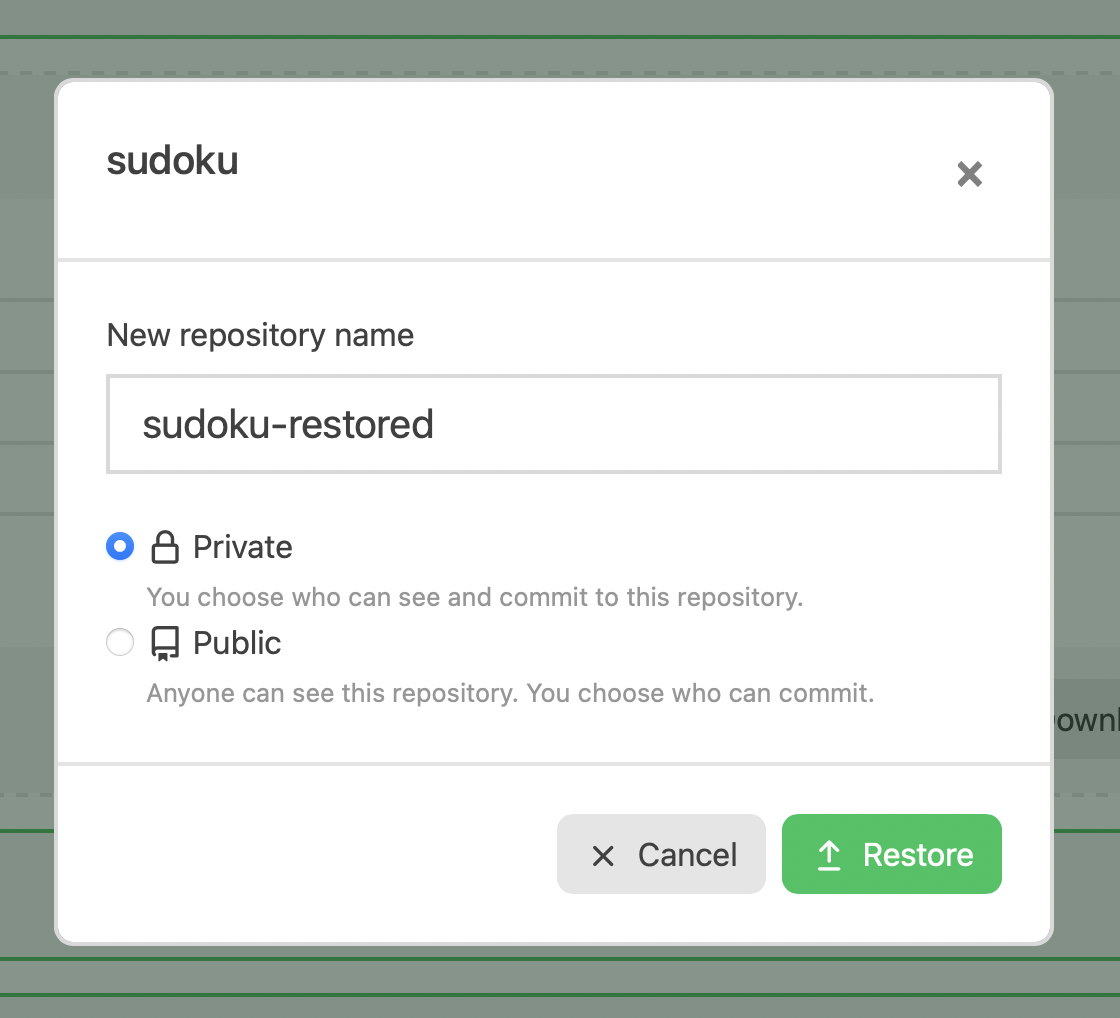
To restore a repository, expand the archived repository in Rewind and click Restore.
You will be asked to enter the repository’s name and visibility.

You will need to give access to BackHub Restore on your GitHub account. BackHub Restore requires read and write permission (while the regular backup app simply requires read permission). You can choose a random repository to do this.

After that, Rewind will start restoring your repository into a new repository. You can check the progress in detail on your Rewind profile. It will show messages like “Restoring Issues.”
After the restore is done, you will be notified by a message on your Rewind profile.

If you go to your GitHub profile, you’ll find the newly restored repository with the name you entered when you started the restore process. It will have the same code, issues, pull requests, and other data, just as if it were never deleted.
Permanently Deleting a Repository
If you don’t want a repository you deleted or archived on GitHub to remain backed up on Rewind, you can go to the archived repository on Rewind and expand it. You’ll see a Delete button.
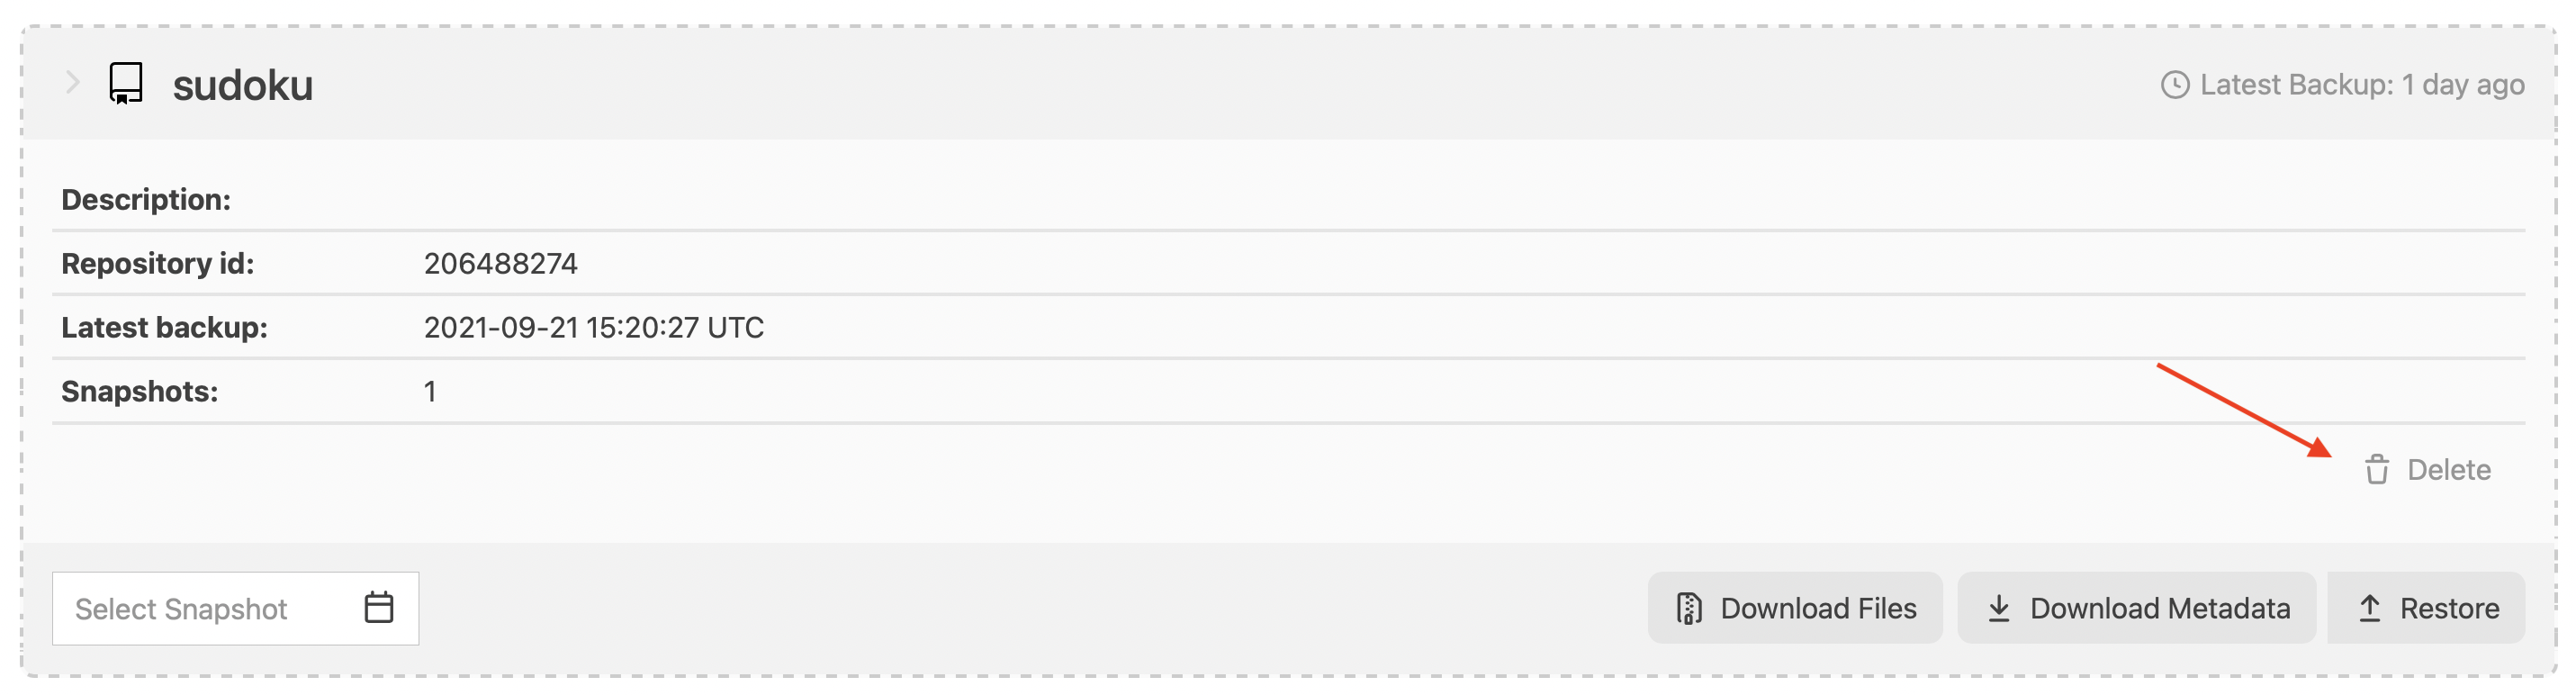
When you click on the button, you’ll be asked to perform your action in a pop-up. Keep in mind that if you delete the repository’s backups from Rewind, you will not be able to access them again. Only proceed if you’re sure.
After Rewind confirms the deletion, the repository and its backups will be deleted from your account.
Conclusion
It’s important to maintain your GitHub profile to the highest standard because it can encourage employers to hire you or new clients to work with you. Sometimes old GitHub repositories, unfinished projects, or other concerns can be problematic for your portfolio.
Using Rewind, you can ensure that your repositories are constantly backed up, and if at any point you need to remove a repository from your GitHub profile, you will still be able to restore it completely using Rewind’s backups.
 Shahed Nasser">